Take a look at what's in the latest Frog Release - Discover Hopper
Creating a Site
When you wish to create a new site you must access the Sites area within FrogDrive. When the FrogDrive application is open, click Sites on the left to expand the sites area. By default, you will be viewing “My Sites” which will contain a list of all sites that you (the logged in user) has created.
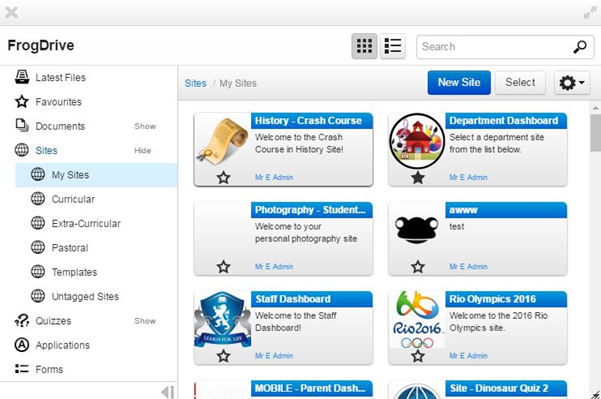
In order to create a new site, click on the dark blue “New Site” button to begin the process and open the site creation wizard. The background will turn grey and the active new site dialogue box will appear at the forefront.

The first step when creating a new site is to select a template. If you are creating a new site from scratch simply select “blank template”. If you have already create a site and it is saved as a template (with existing content) then select the template from this list. Please note there is also a "Frog Templates" button on the left hand side which over time will be populated by Frog with sites with pre-built content for schools to use and edit. Once you've selected a template, click the “next” button to continue.
The next step is to provide a suitable name and description (optional) for the site. In order to make it easy to distinguish precisely who is accessing the content you will need to provide a unique name for the site.
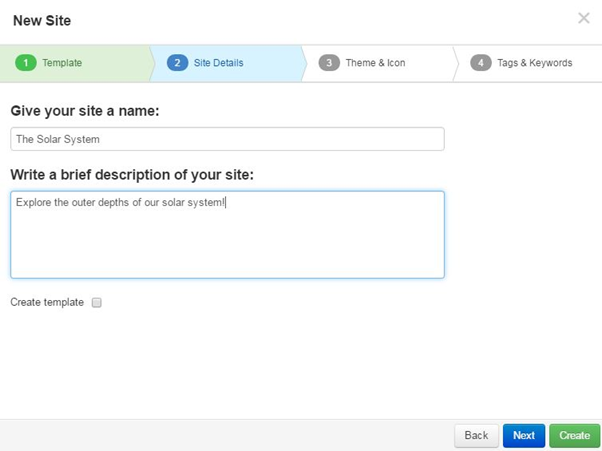
When you have provided the appropriate name for the site (decription is optional), click the blue “next” button.
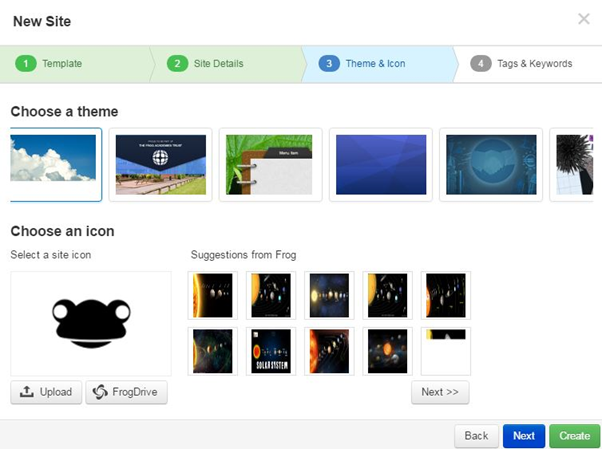
You are then able to choose a theme for your site and an icon to be used for the site. The theme you select will determine the general aesthetics of the site such as the main background, fonts used and menu layouts.
The icon you choose will be visible on the site link widget and when searching for sites in the FrogDrive application, making it easier to search for a site. The site icon results are loaded from Google Safesearch and are based on the site name that was entered on the previous screen. You can choose to upload your own image or click “Import” to use an image already uploaded in your Frog Files (schools with network drives setup can access the school network to find images). It is worth noting that these settings will already be filled in if you chose a template site in stage one of the site creation wizard.
Once you are happy with your choices, click “Next” to continue or “Create” to be taken to your site without choosing further settings. After clicking "next", the fourth part of the site creation wizard is for tagging sites to help users find your sites.
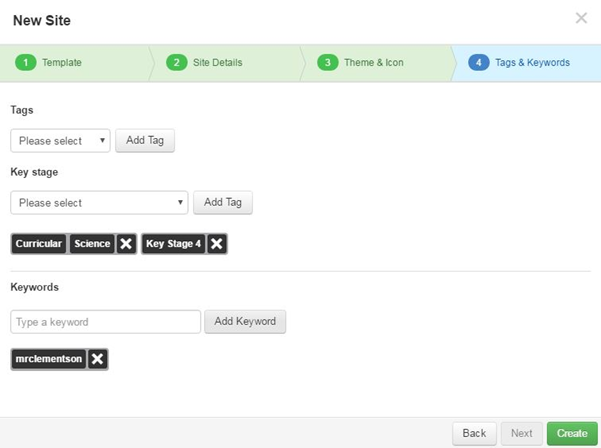
Tagging allows users to easily find your sites once they have access to search and find them. Using the dropdown menus you can tag them accordingly. The tagging options differ between primary and secondary schools. The keywords option allows you to add any words or phrases so users can type these terms into the global search box on the top navigation bar to find the site. For example as a teacher you may wish to add a keyword of your name for every site you create so users can type your name into the global search and be shown a list of all your sites.
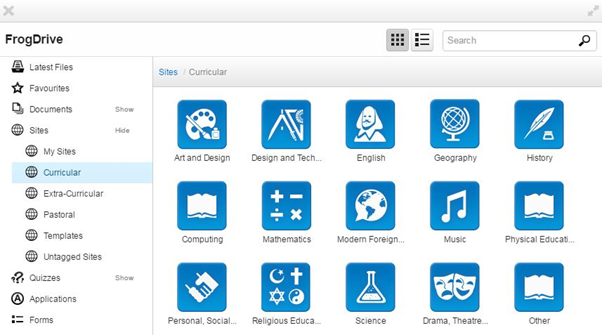
Tagging the site in the above screenshot means that when navigating to the FrogDrive application and clicking on Sites --> Curricular you will see a similar result to below (note the "Science" icon, indicating sites have been tagged with Science).
Tutorials in this series...
product hubs
Product updates
