Back to Google Activity Widget
Google Activity Pre-Requisites
Before the Google Activity widget can be used there are a few pre-requisites that must be completed by the administrator. These include:
- Configuration of the Google Drive integration. For more information on how to configure this, head to the setting up Google Drive page in this series
- Configuration of the Google ID field in the Users application. For more information on how to configure this please refer to the relevant how-to section below:
- How-to (Frog 3 / FrogLearn)
- How-to (FrogLearn Standalone)
How-to (Frog 3 / FrogLearn)
Ahead of teachers being able to assign a Google document as a piece of homework, all users will need to have their Google ID field populated for a Frog 3 / FrogLearn setup though this will need to occur within the Frog 3 Toolkit.
Login as an administrator to the Frog 3 Toolkit and navigate to Tools > Config > Google Apps.

Enter your Google domain into the Domain field. Your Google domain will be after the @ symbol in the users Google email address. So in the example of dbarns@frogosdev.co.uk the domain that is entered into Frog 3 would be frogosdev.co.uk.

After the Google domain is entered select the Save button.

Next navigate to Admin > Users. In the search options ensure that the field UID is selected as well as any other relevant fields to help identify users. The results of your search are displayed.
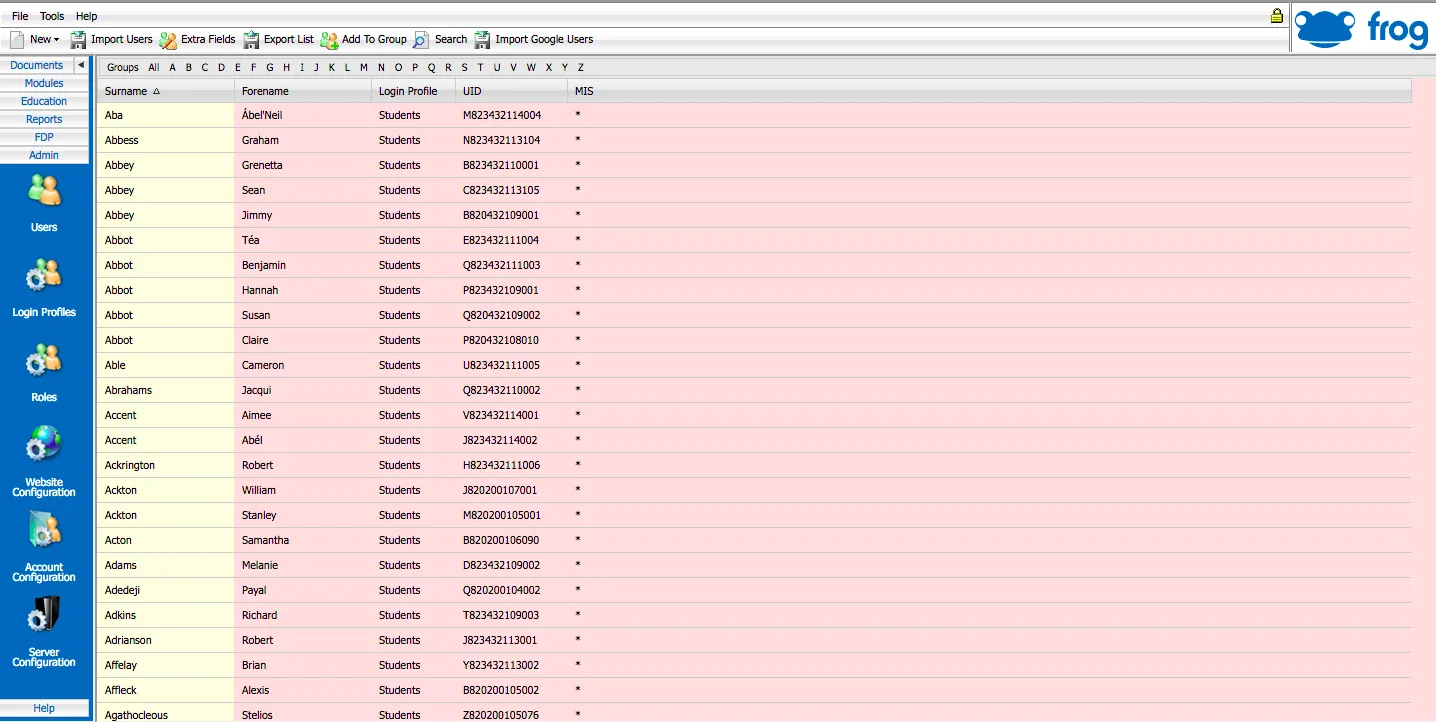
Select the Export List option and a CSV file will download to your local device.

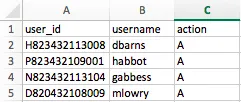
Open the CSV file and edit the file to contain only the following 3 fields:
- user_id – This field will be populated with the content of the UID in the downloaded CSV. e.g. H823432113008
- username – This field will contain the username as known in Google prior to the @domain. e.g. dbarns
- action – This field should be populated with a capital A for add.
Populate the CSV file for all users that are to have the ability to assign / submit using the Google Activity widget. When happy save the CSV file.
Navigate back to the Frog 3 Toolkit and select the Import Google Users button

The Google Import pop up window will be displayed. Select your modified CSV file to upload and then select the Import button.
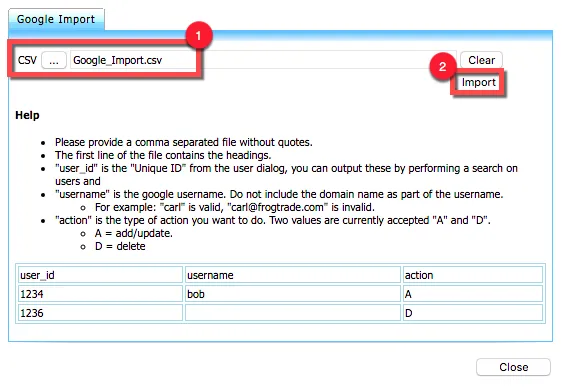
The changes specified in your CSV file will be imported and the results displayed within the Google Import pop up window. Select the Close button to return back to the User management area.
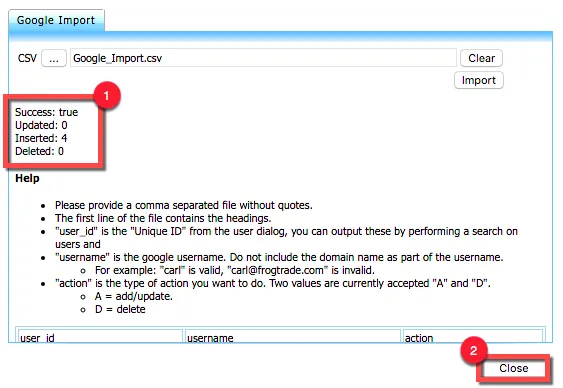
The Google ID field will be synchronised to FrogLearn as part of the hourly process.
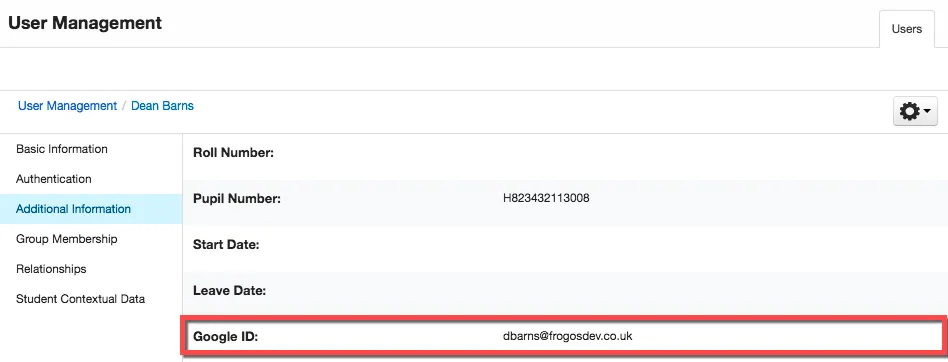
To check that the Google ID has been synchronised successfully, navigate to FrogLearn and open the Users application. Search for a user and select Additional Information from the left hand side menu. Check that the Google ID field has been populated with the users Google email address as per the CSV upload. In this example we can see that the Google ID is displaying as dbarns@frogosdev.co.uk.
How-to (FrogLearn Standalone)
Ahead of teachers being able to assign a Google document as a piece of homework, all users will need to have their Google ID field populated.
Login as an administrator and open the Users application.
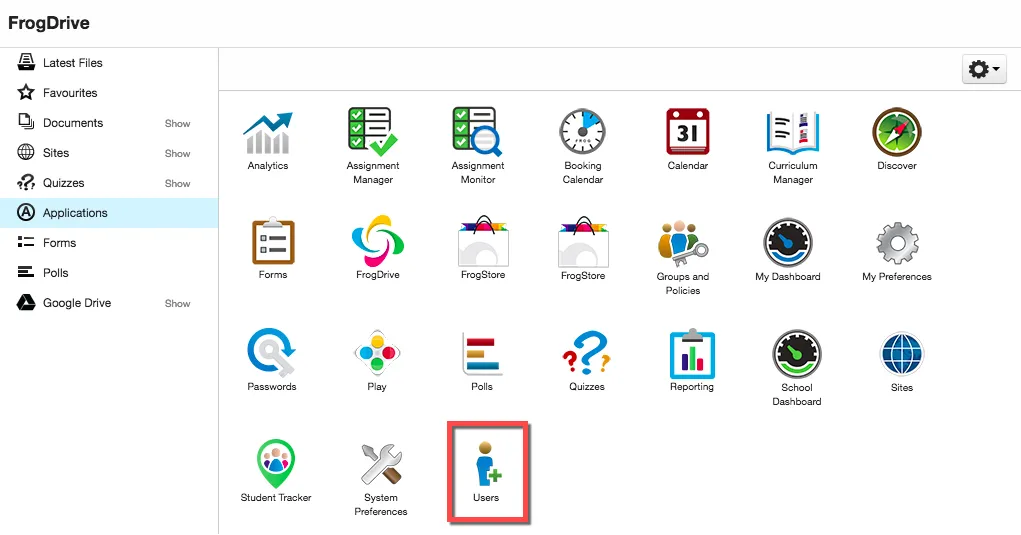
After the Users application opens, the Google ID field can be updated in two ways. If this is the first time you are setting up the Google integration, it is recommended that the Google ID field is updated via the CSV export / import process. Within the Users application navigate to the Actions cog and select Export.
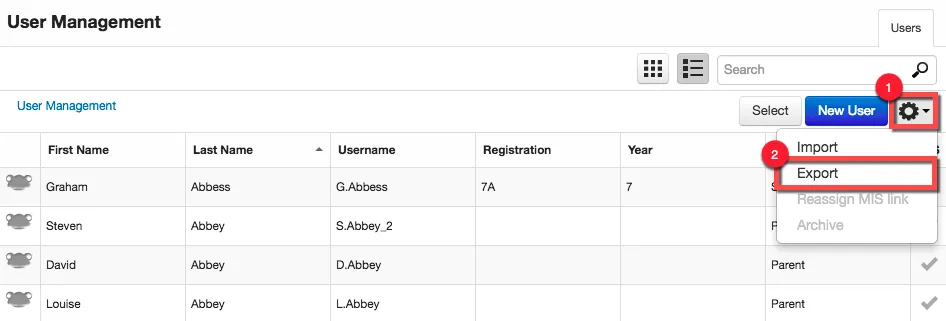
The CSV file will download to the location set by the browser. Open the CSV and look for the field labelled Google ID.
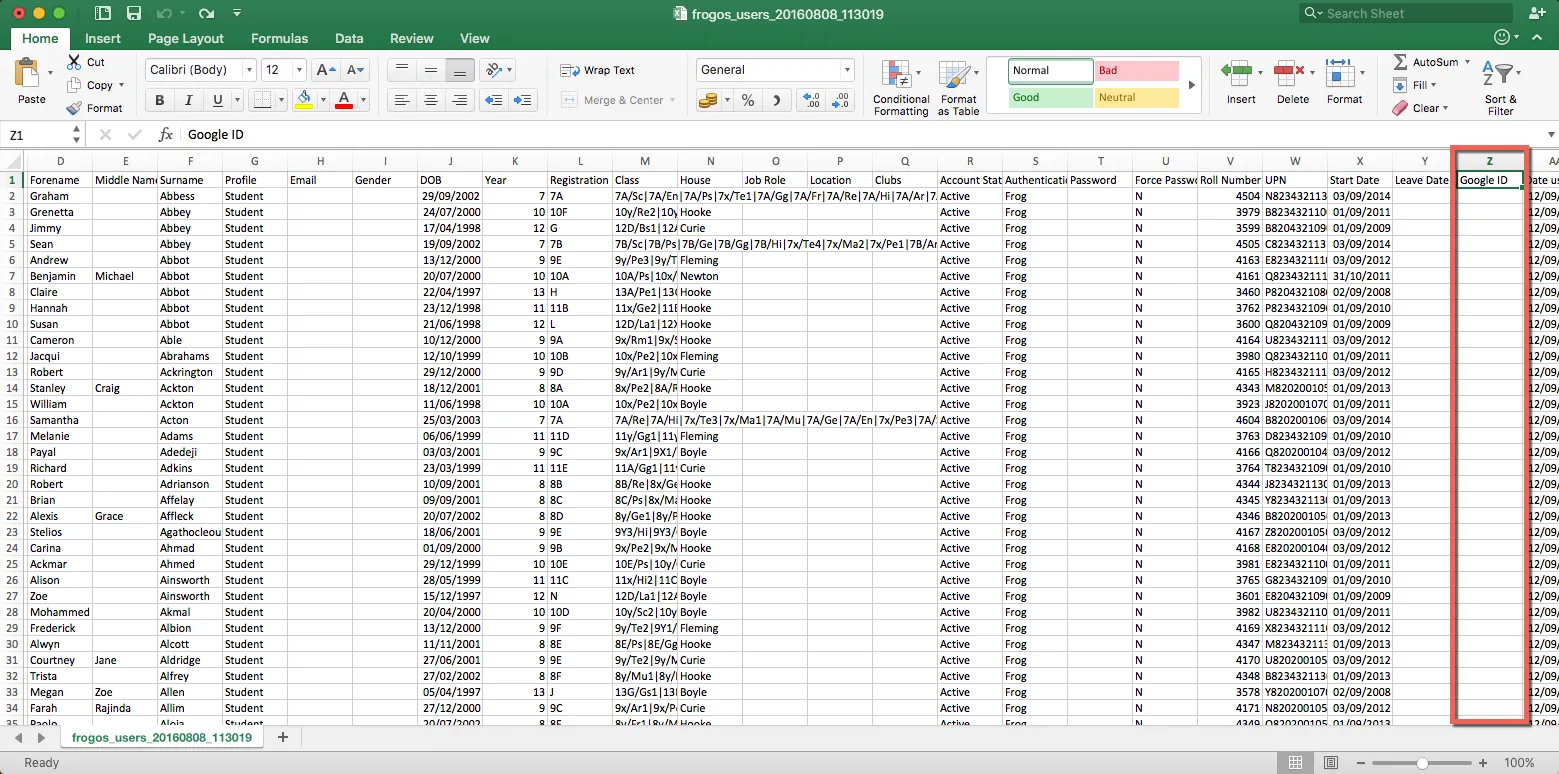
Populate the Google ID field with the users Google email address. For example, a student Tracy Wilson has a Google email address of twilson@frogosdev.co.uk and this would need to be entered into the Google ID field. Complete this process for all relevant users in the CSV file.
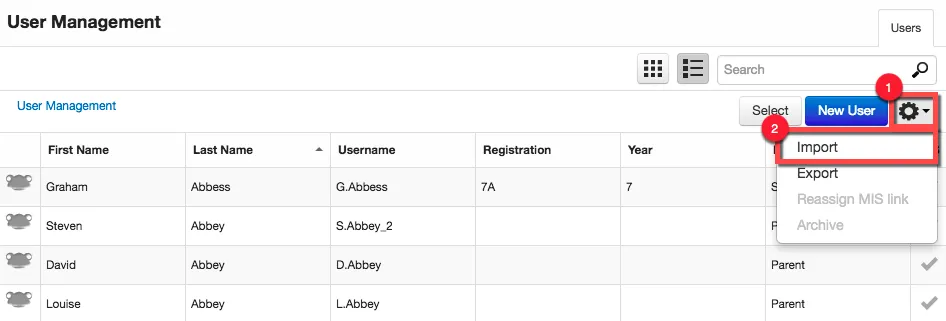
When happy save the CSV file and import this back into the Users application by selecting the Actions cog and Import. Follow the onscreen instructions to import the data.
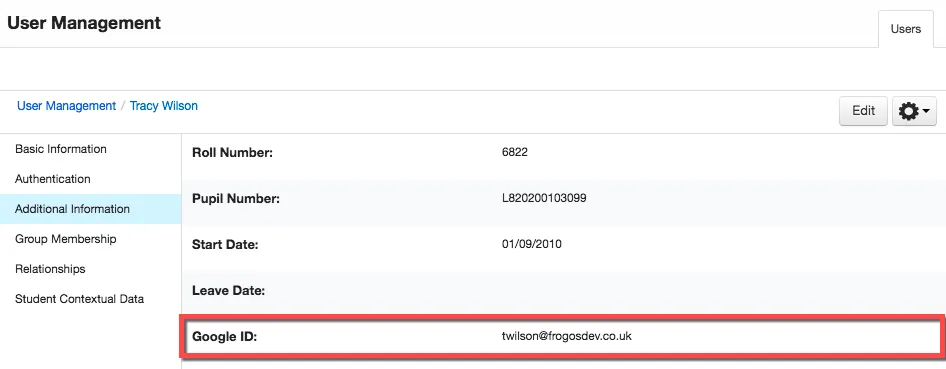
To check that the Google ID has been imported successfully, search for a user and select Additional Information from the left hand side menu. Check that the Google ID field has been populated with the users Google email address as per the CSV upload. In this example we can see that the Google ID is displaying as twilson@frogosdev.co.uk.
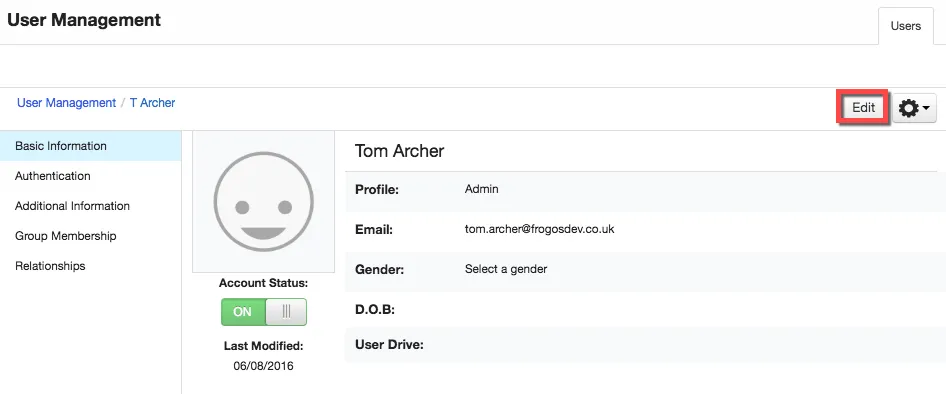
Alternatively, if there a requirement to edit a few users, this can be achieved manually. Search for a user within the Users application and then select the Edit button.
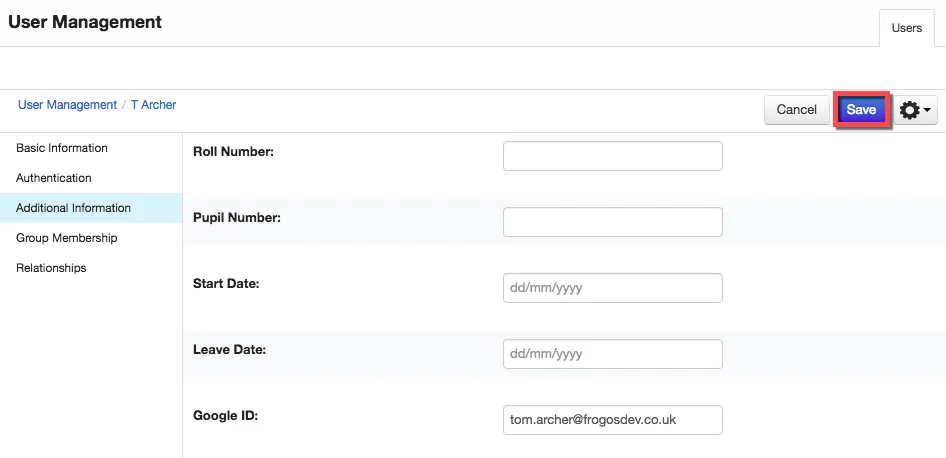
In this example we are going to edit the details for a staff member Tom Archer.
Select Additional Information option from the left hand side menu.
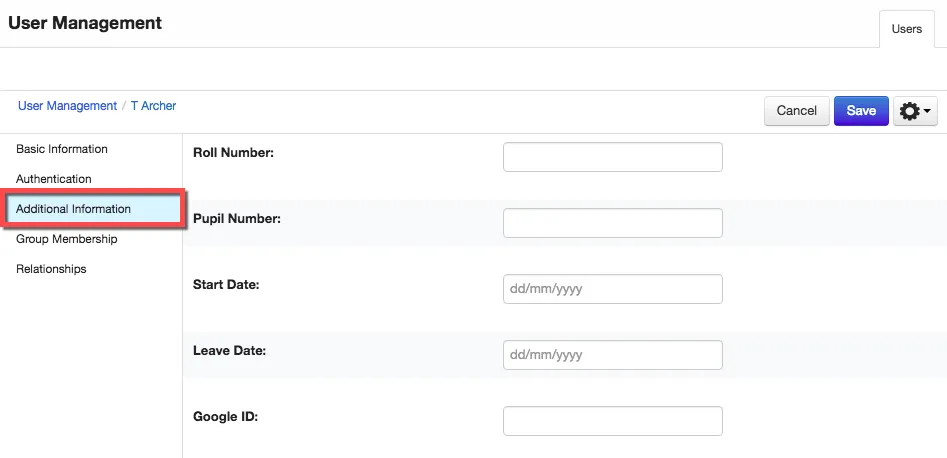
In the Google ID field enter the users Google email address. In this example the staff user Tom Archer has a Google email address of tom.archer@frogosdev.co.uk which has been populated into the Google ID field.
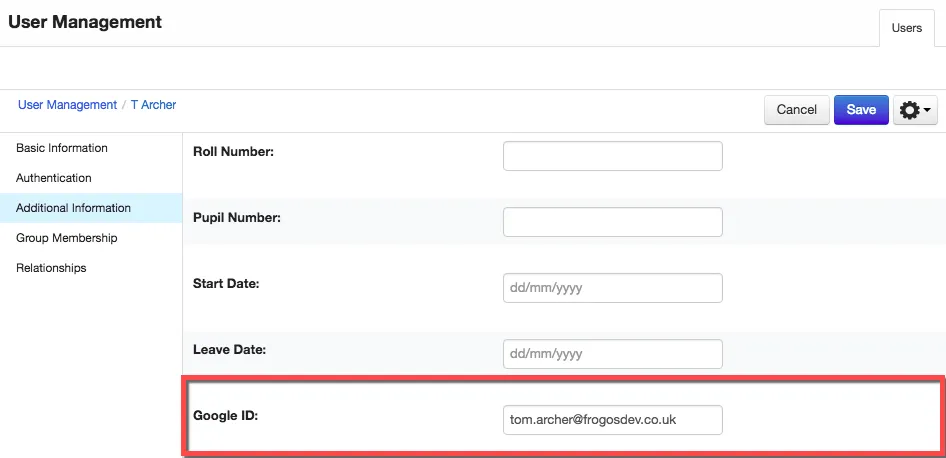
When happy with the Google ID entered select the Save button to have the change applied immediately.
