Contextual Data in FrogProgress
Assisting teachers in tracking progress of various contextual groups
Take a look at what's in the latest Frog Release - Discover Hopper
The addition of contextual data within FrogProgress is a key feature of the Newton release. The ability to filter contextual data in the Student Tracker application as well as the Reporting application will assist teachers in tracking progress more easily for various contextual groups. The areas that the contextual data changes will impact include:
- Importing contextual data via SIMS.
- Importing contextual data via CSV.
- Manually adding contextual data via the Users application.
- Student Tracker filtering with contextual data. This will include how to:
- Apply a contextual data filter
- Apply multiple contextual data filters
- Removing a contextual data filter
- Reporting application to include a new Learning Objective Coverage by Contextual Group report.
- Ability to filter all school reports using contextual data.
Importing Contextual Data via SIMS
Schools using SIMS can have their contextual data automatically imported. However, this will require the installation of the new SIMS latest Frog Extractor (v3.5.4 - 05/04/2016)
To obtain a copy of the extractor as well as getting assistance on the installation please contact the Service Desk on 01422 395 939 or servicedesk@frogeducation.com.
NOTE Schools not using SIMS can still have their contextual data imported via a CSV import process or manually updating users on an individual basis in the Users application. More information is provided below in the Newton release notes.
Importing Contextual Data via CSV
Please view https://frog.frogcommunity.com/configure-context-data for more information on the process to import contextual data via a CSV import.
Should you experience any issues with the process then please contact the 01422 395 939 or servicedesk@frogeducation.com who will be happy to assist.
Manually adding contextual data via the Users application
Schools not using SIMS can also modify a student’s contextual data via the Users application. This process is only recommended if small changes are required.
To open the Users application, navigate to FrogDrive > Applications and select the application Users.
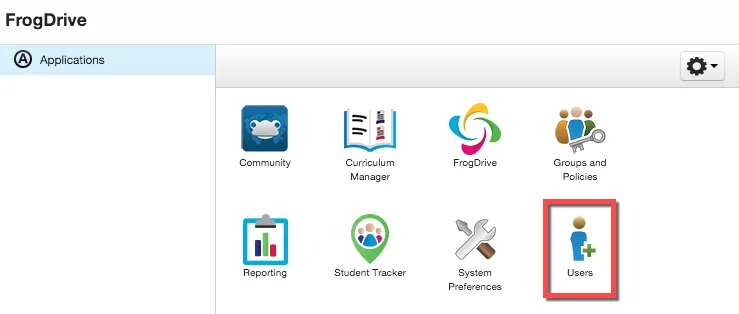
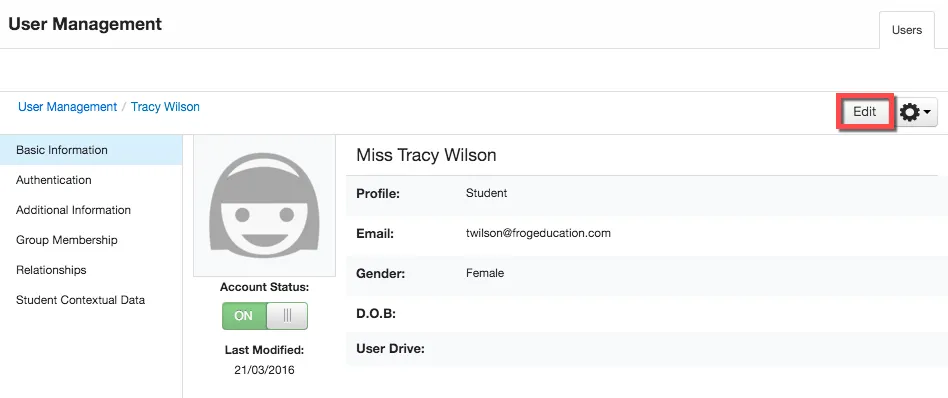
Search for the user you wish to add or modify contextual data for. Select the user and then click on the Edit button.
Select Student Contextual Data from the left hand side menu.
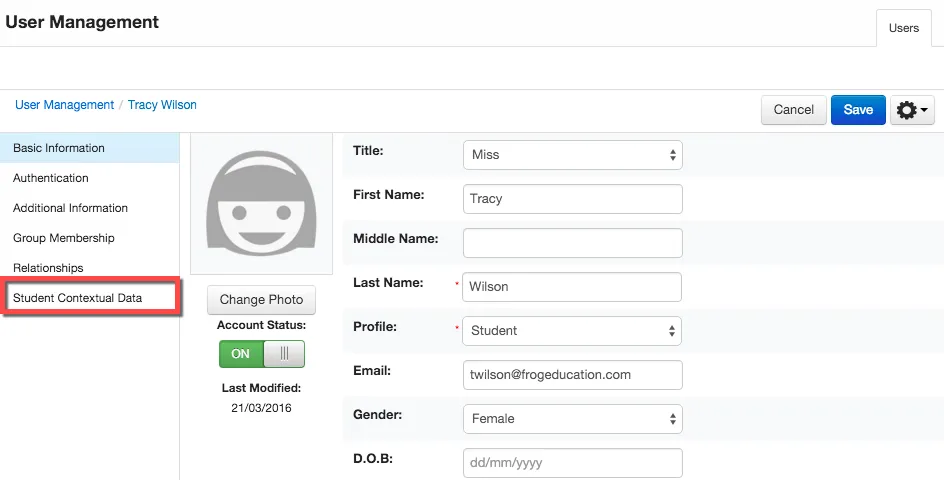
A list of contextual data fields will be displayed.
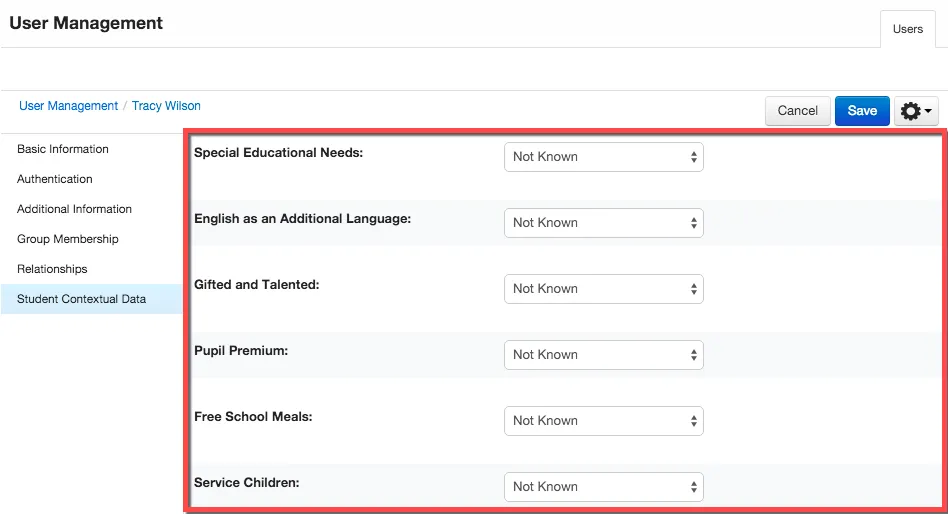
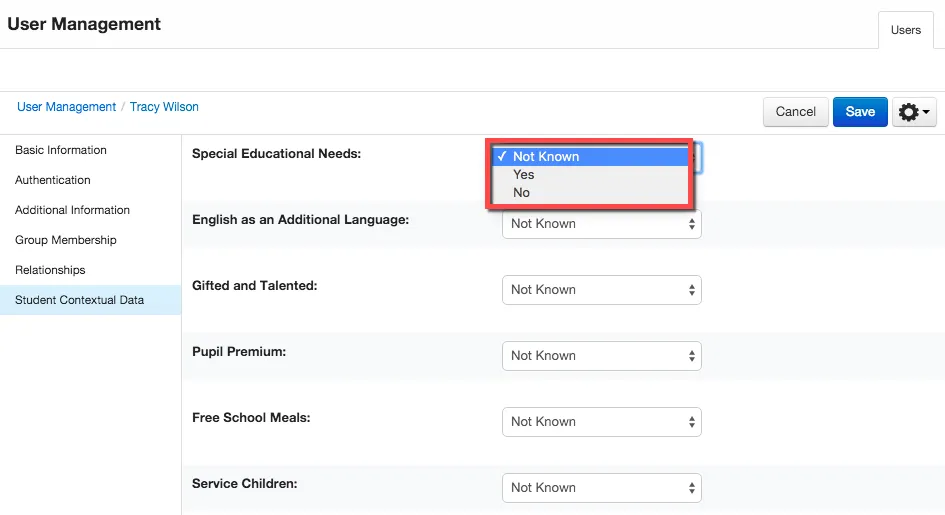
Select the drop down menu next to the contextual data you wish to update and select one of the following options:
- Not Known
- Yes
- No
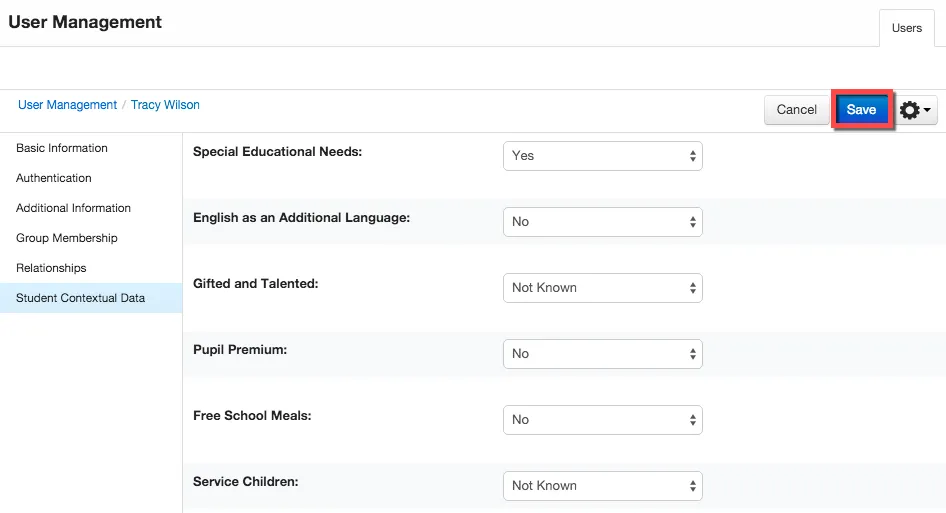
When happy with the contextual data options selected click on the Save button. The changes will be applied immediately for the selected user.
Student Tracker – Applying a contextual data filter
With the introduction of contextual data, Student Tracker will be able to quickly and easily compare results of different contextual groups within their trackers, without the need to go into the Reporting application. Open up Student Tracker and select a tracker. In this example we have selected 4JV, Mathematics.
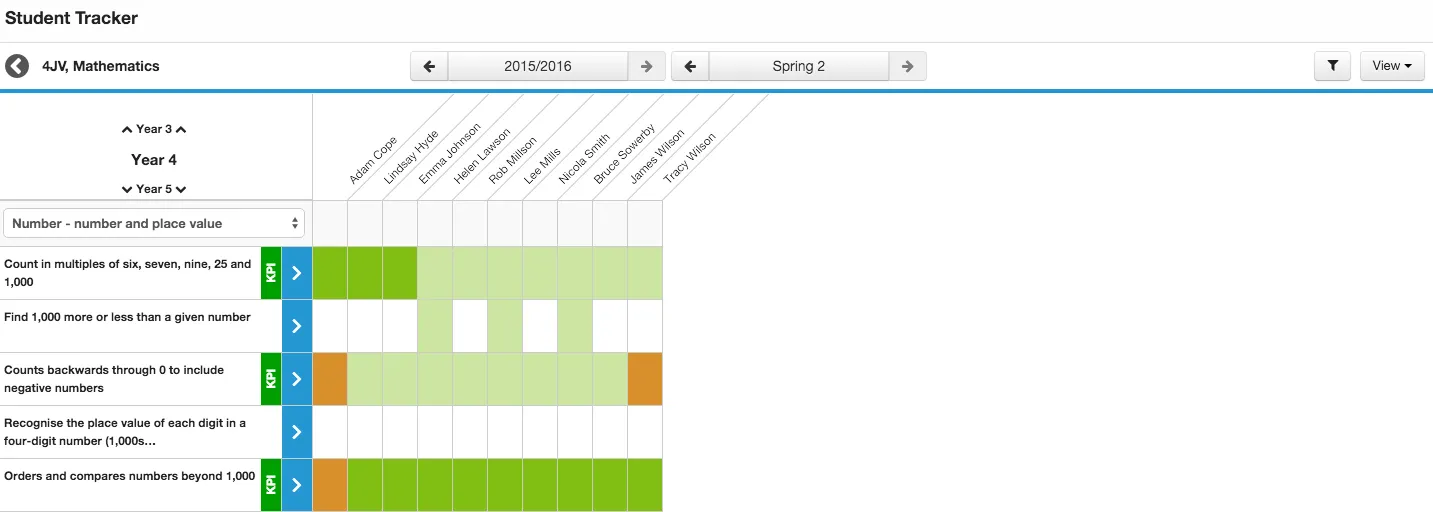
Within each tracker there will be a new filter button available.
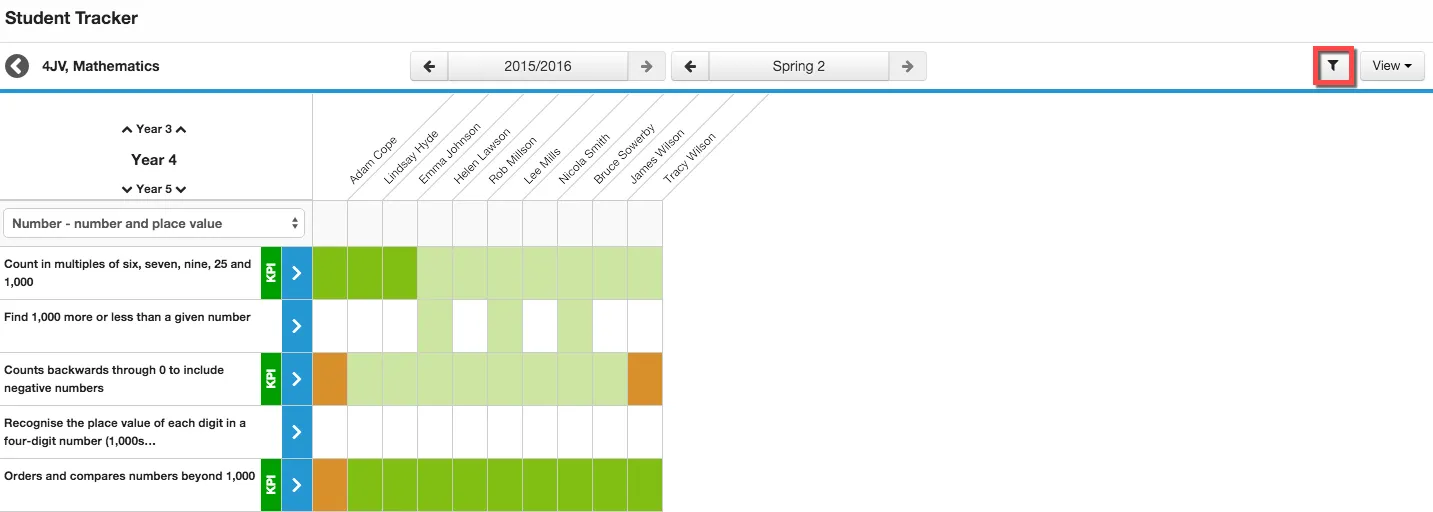
When selecting the filter button the Contextual Filter window is displayed.
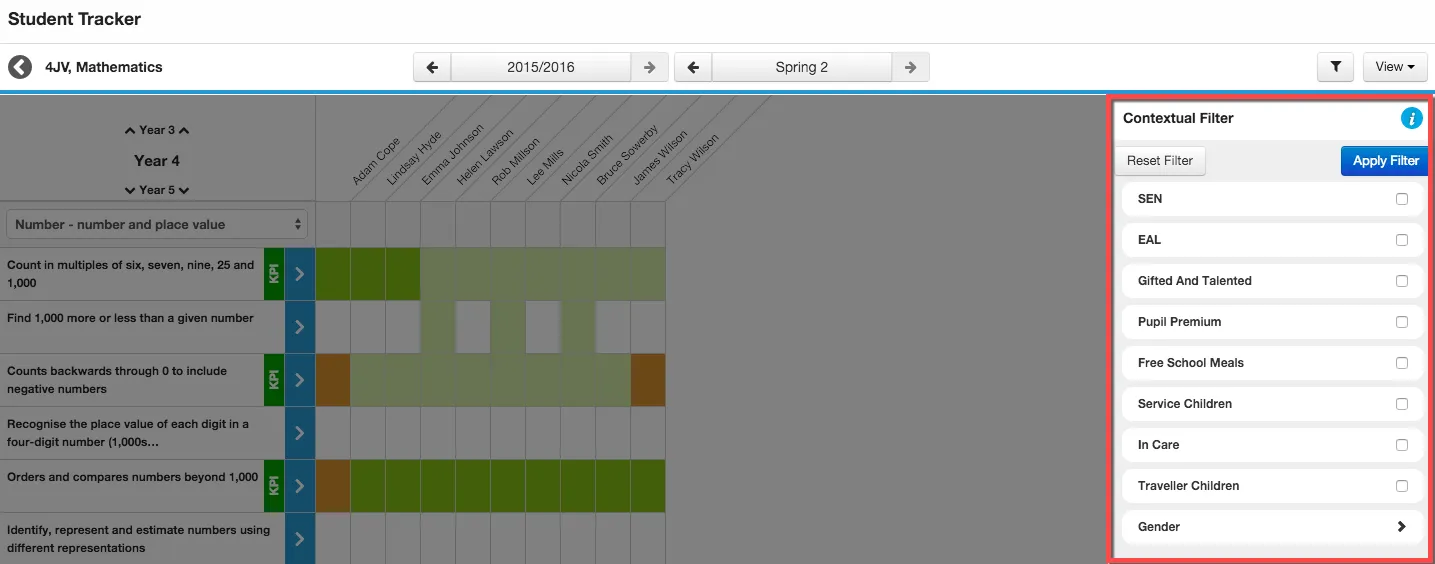
Select the check box next to the contextual data filters you wish to have applied to the tracker.
NOTE Multiple contextual data filters can be selected and this is explained in more detail within the Newton release notes > Student Tracker .
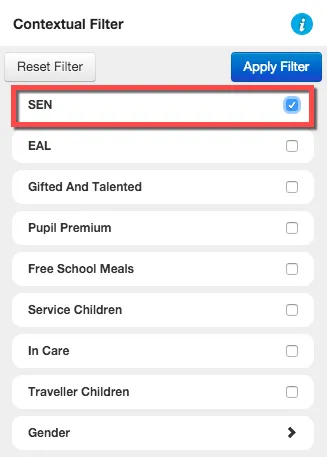
When you are happy with the options selected, click the Apply Filter button.
The tracker will refresh and display students that match the contextual data filter selected.
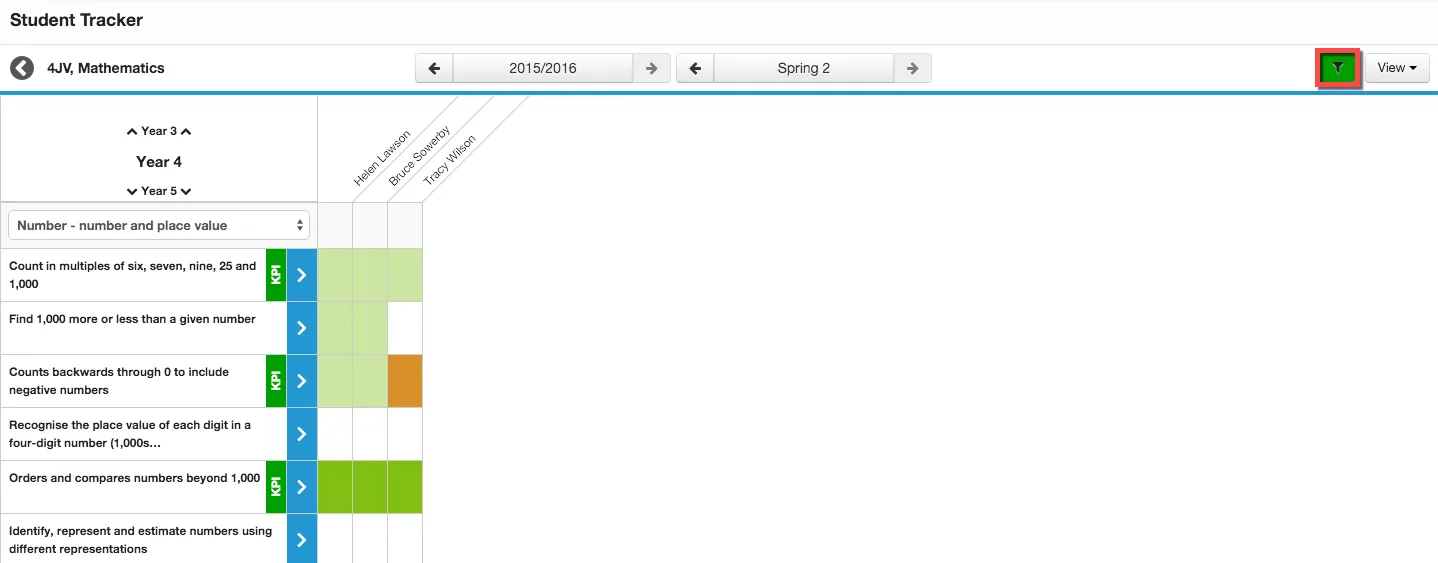
Student Tracker – Applying multiple contextual data filters
Multiple contextual data filters can be applied to a tracker, however, you need to be aware of the logic in how the data will be presented back.
The logic applied when selecting multiple contextual data filters is AND logic. For example, you select the checkbox for the SEN and EAL filters and have these applied to the tracker. Only students that were in both the SEN and EAL groups would be displayed in the tracker. Students that only existed in one of the groups, either SEN or EAL, would not be displayed in the tracker.
The Gender contextual data however uses OR logic. For example, you select the checkbox for Male and Female filters and have these applied to the tracker. Students that were in either the Male or Female would be displayed in the tracker.
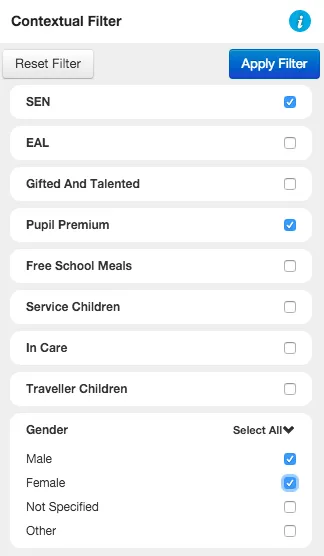
Below is a real example of how the context data filters could be used:
- Action - Select the contextual data filters for SEN, Pupil Premium, Gender (select Male and Female).
- Logic Breakdown - SEN (yes) AND Pupil Premium (yes)AND Boys (yes) OR Girls (yes).
- Expected Tracker Results - Students who are in both the SEN and Pupil Premium groups are displayed, who are both boys and girls.
Student Tracker – Removing a contextual data filter
To remove a contextual data filter that has been applied to a tracker, select the green filter button.
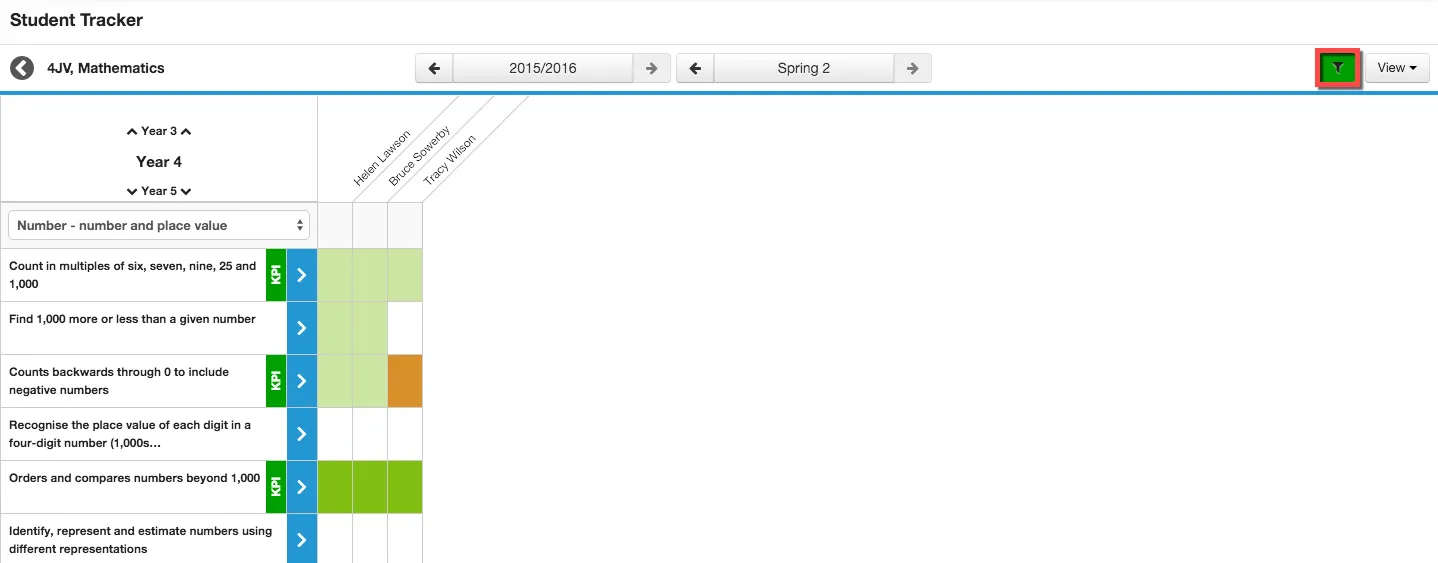
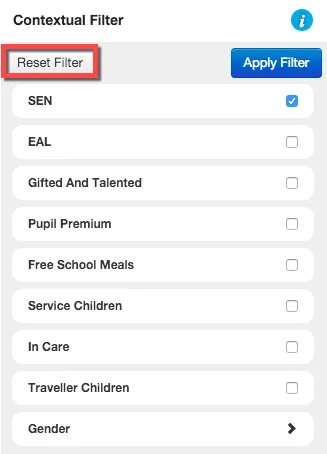
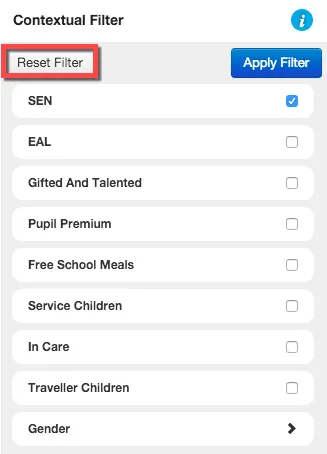
When the Contextual Filter window is displayed, manually remove the checkboxes next to the contextual data filters or alternatively select the Reset Filter button.
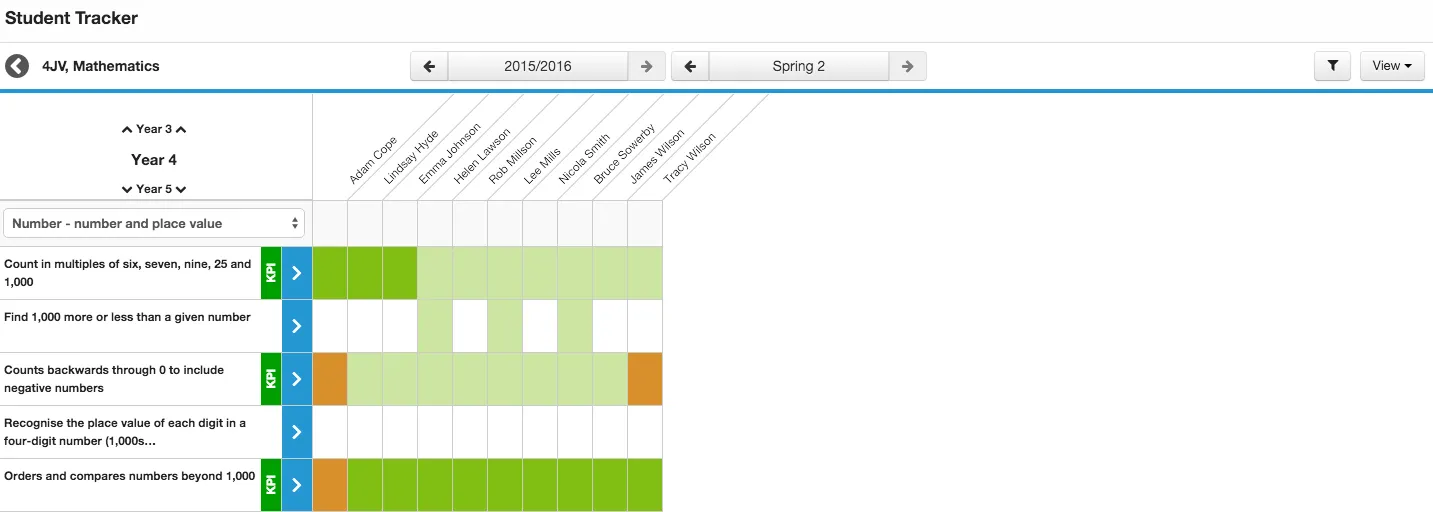
After selecting the Reset Filter button the tracker will refresh and all students associated with the tracker will be displayed.
Reporting Application – LO Coverage by Contextual Group
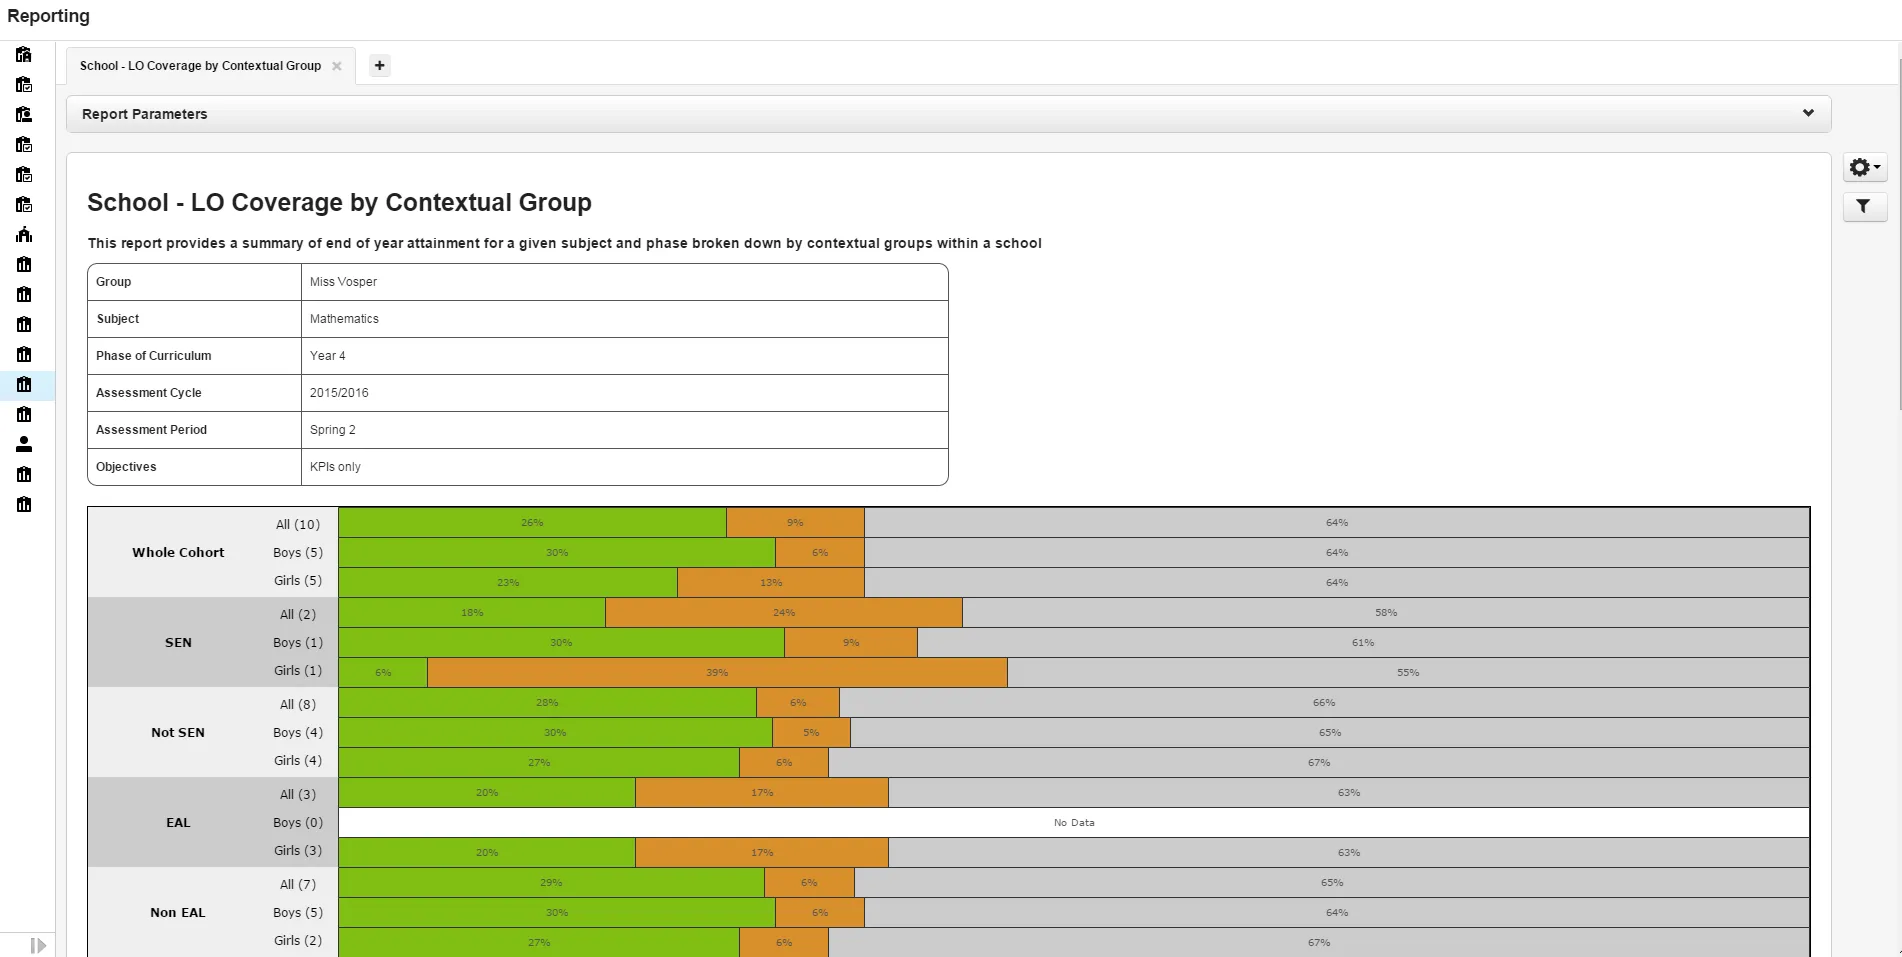
With the introduction of contextual data, a new report has been created allowing users to view an end of year attainment summary for a given subject and phase, further broken down by contextual groups within the school.
This report is designed to provide a snapshot of curriculum coverage for a class at a specific point in time. It can also be used to check that specific cohorts in the class are progressing through the curriculum at a desired rate.
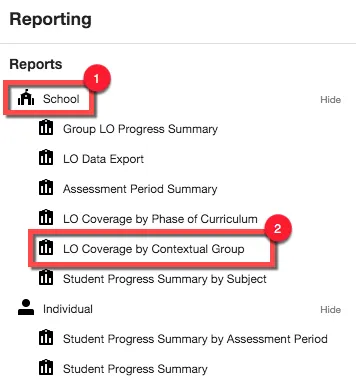
Open the Reporting application and navigate to School > LO Coverage by Contextual Group.
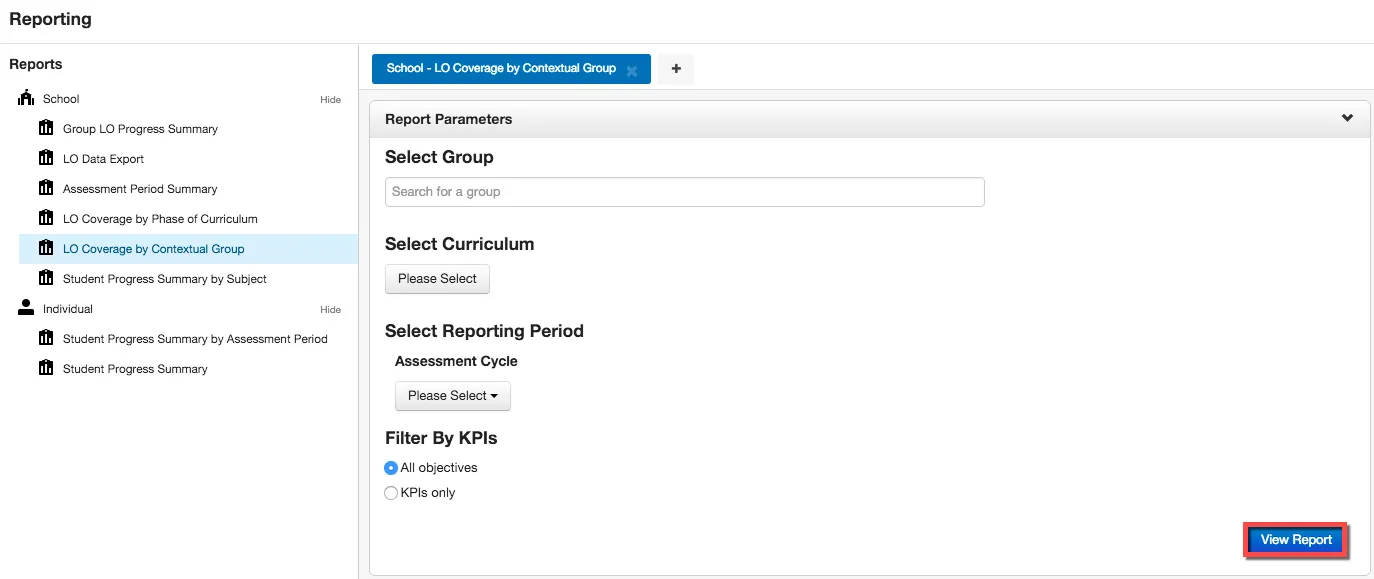
Complete the various report criteria you wish to have displayed and then click on the View Report button.
The results of your criteria is displayed broken down via the contextual groups.
Reporting Application – Filtering School Reports by Contextual Group
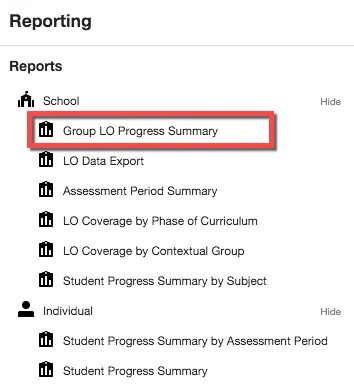
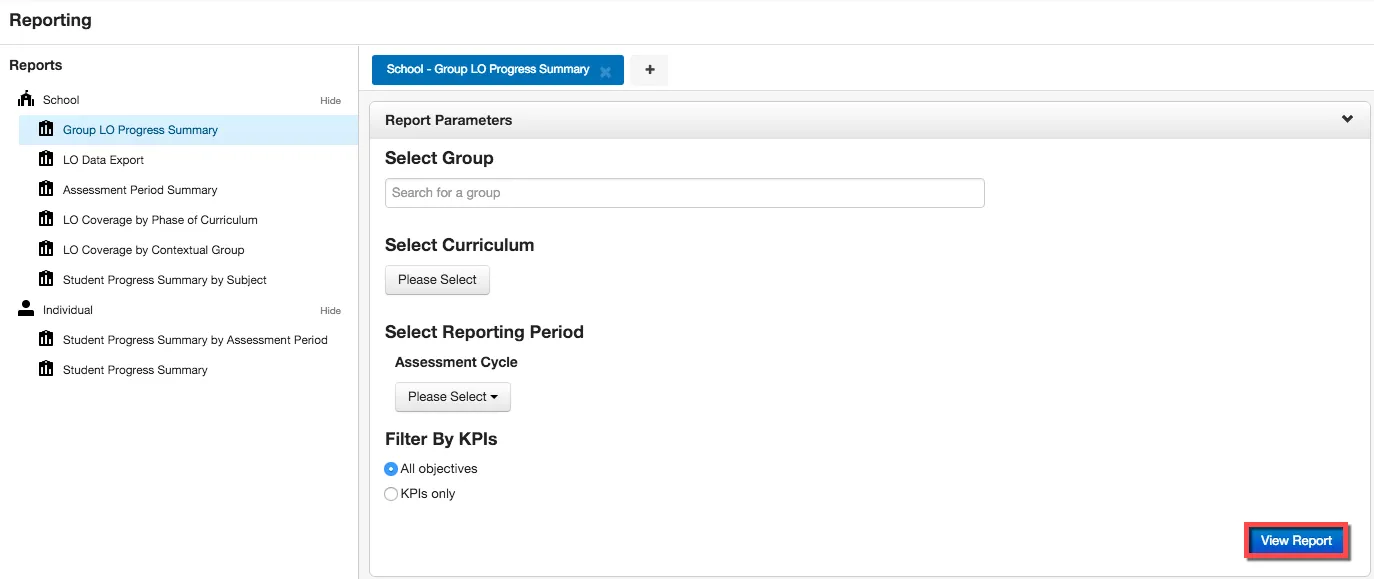
With the introduction of contextual data, all school reports will have the ability to filter by contextual data, allowing teachers and members of the Senior Leadership team to quickly view comparative reports for different contextual groups Open the Reporting application and select a school report you wish to run. In this example we are going to select Group LO Progress Summary report.
Complete the various report criteria you wish to have displayed and then click on the View Report button.
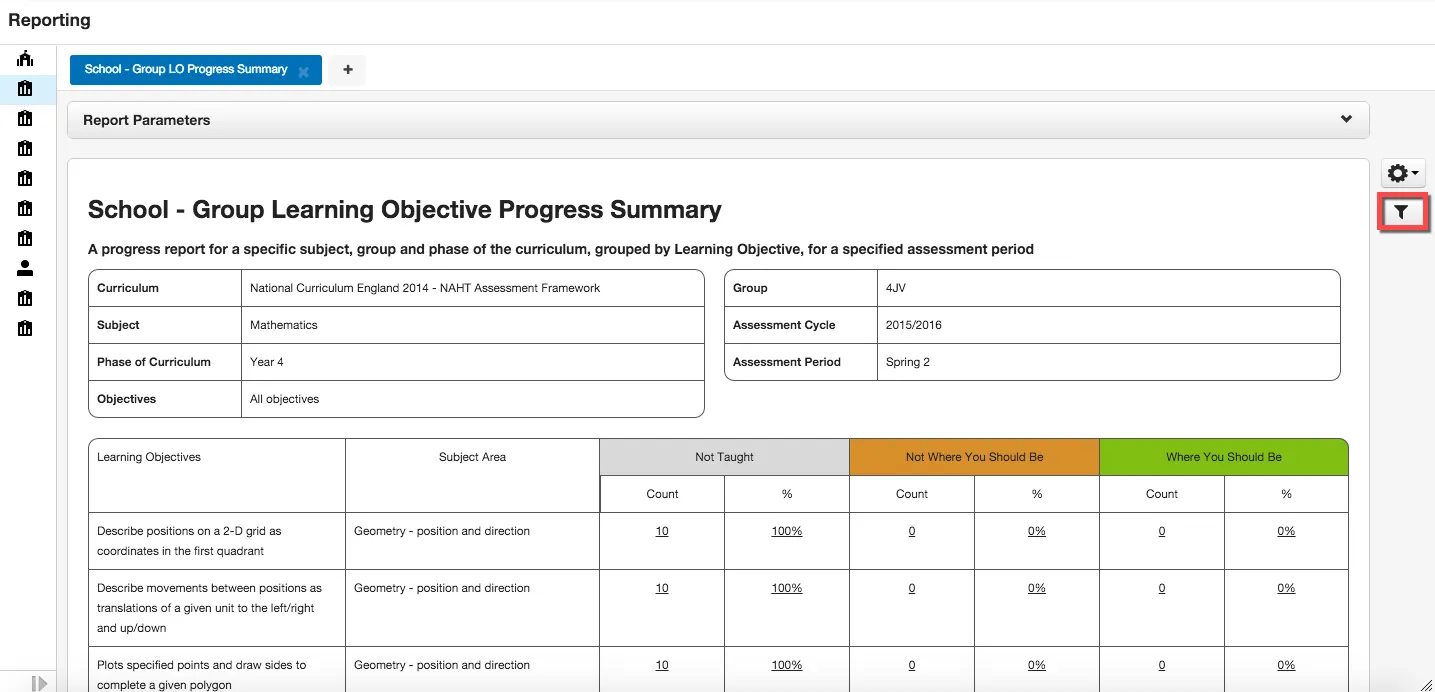
The report is generated based on the results of the criteria entered previously.
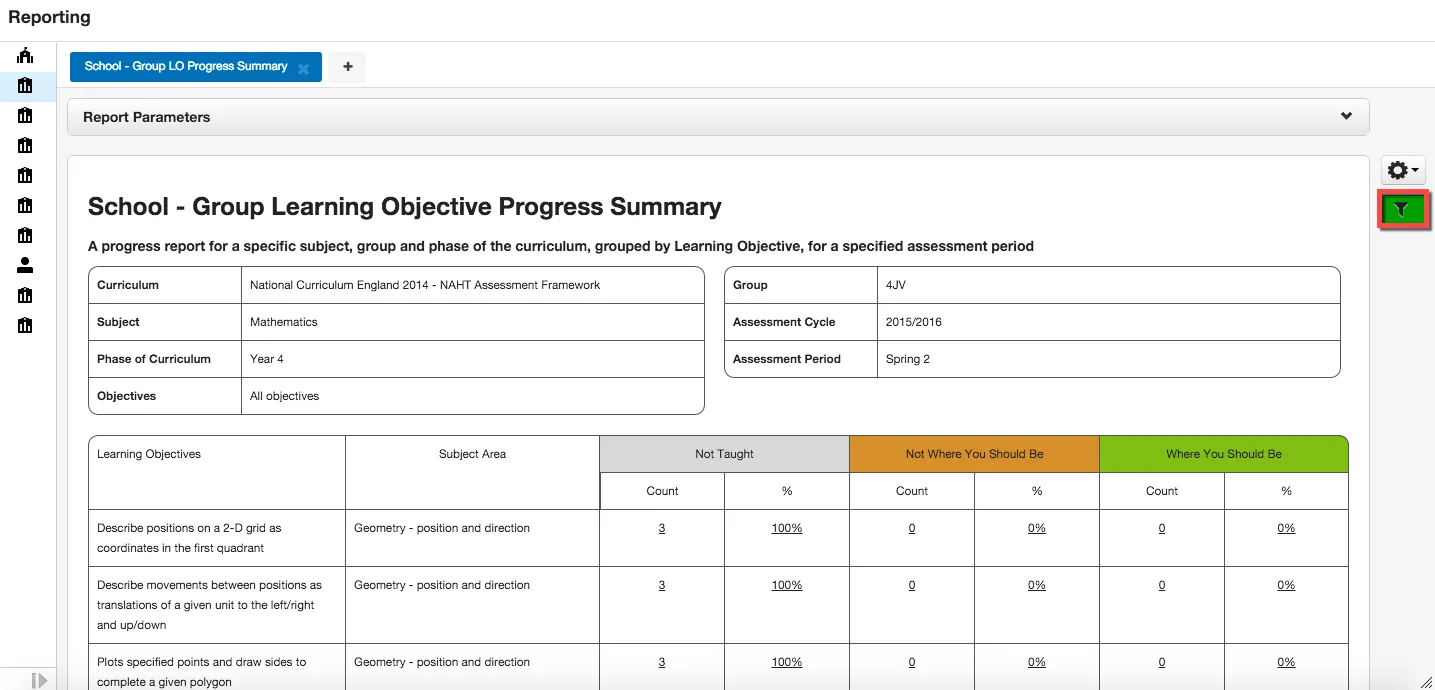
Similar to Student Tracker, within each school report there will be a new filter button available.
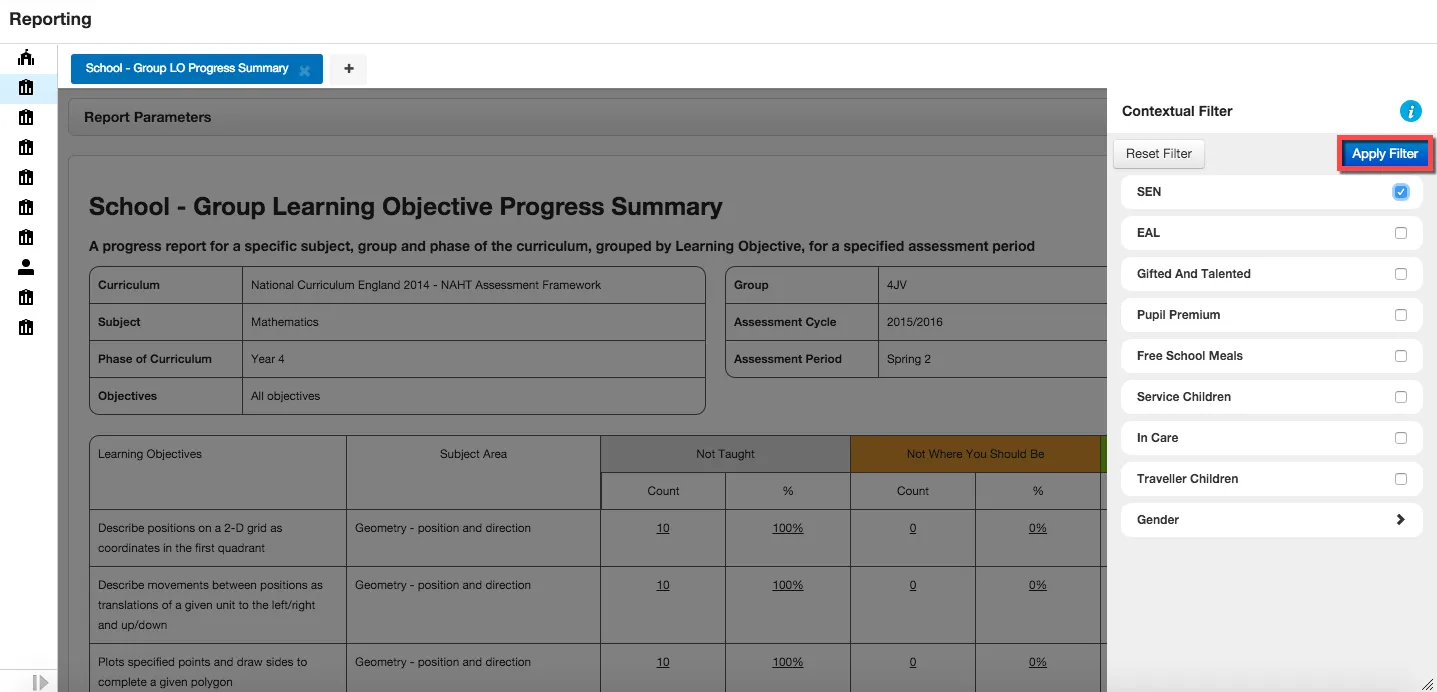
When selecting the filter button the Contextual Filter window is displayed.
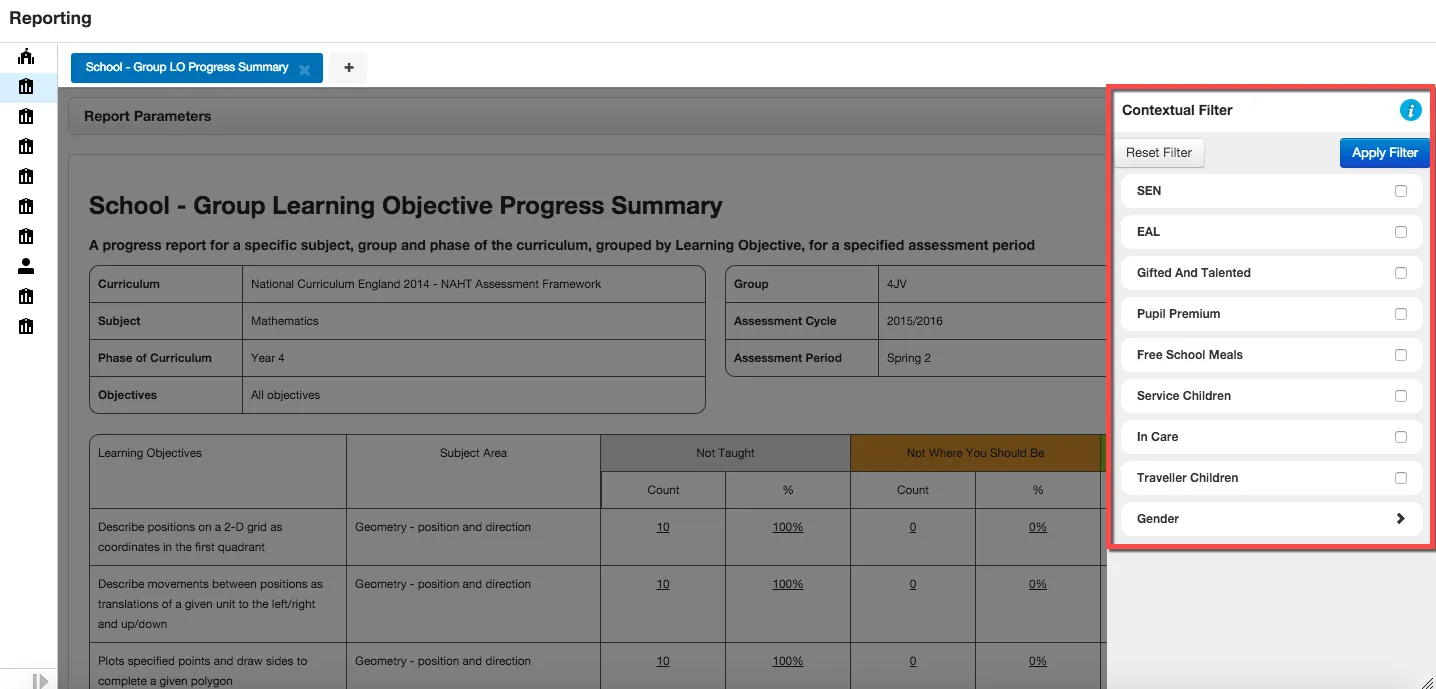
Select the check box next to the contextual data filters you wish to have applied to the tracker.
NOTE Multiple contextual data filters can be selected and this is explained in more detail within the Newton release notes > Reporting Application data filters.
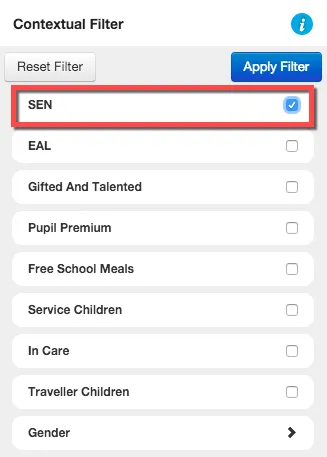
When you are happy with the options selected, click the Apply Filter button.
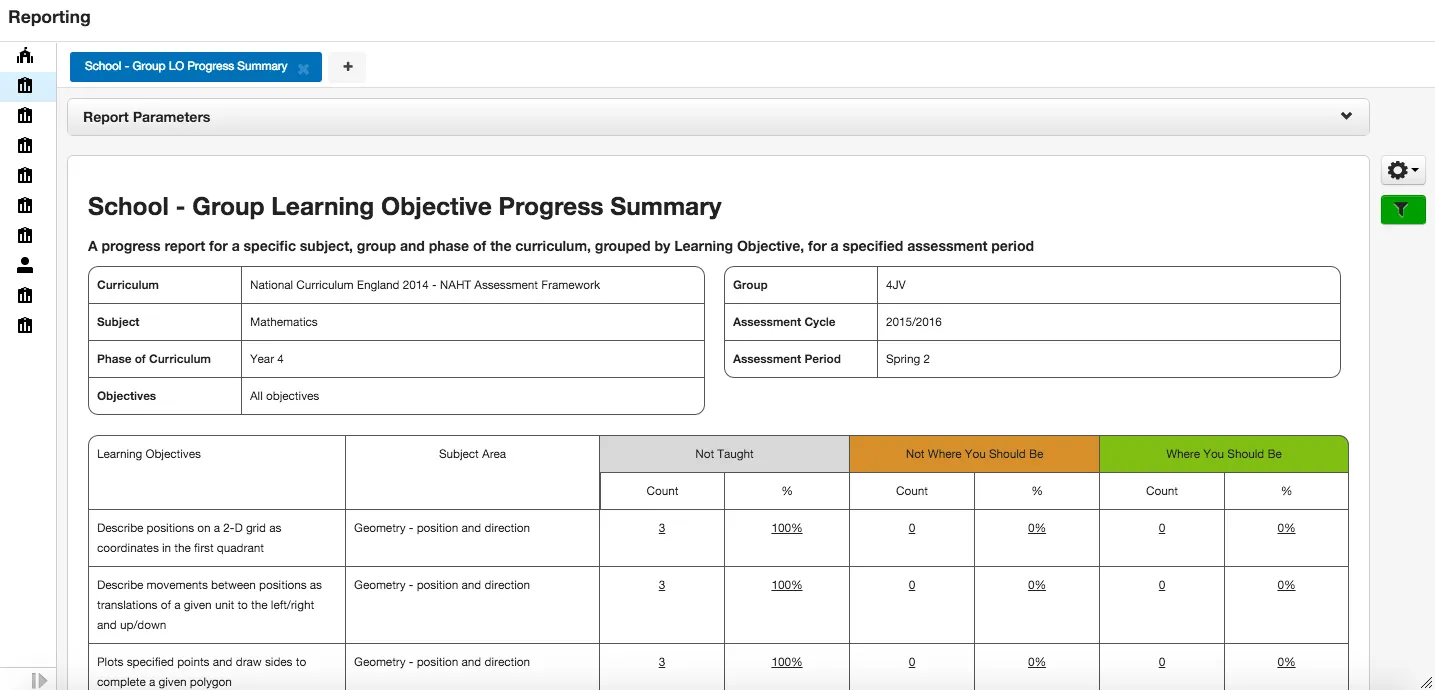
The report will refresh and the figures updated to match the contextual data filters selected.
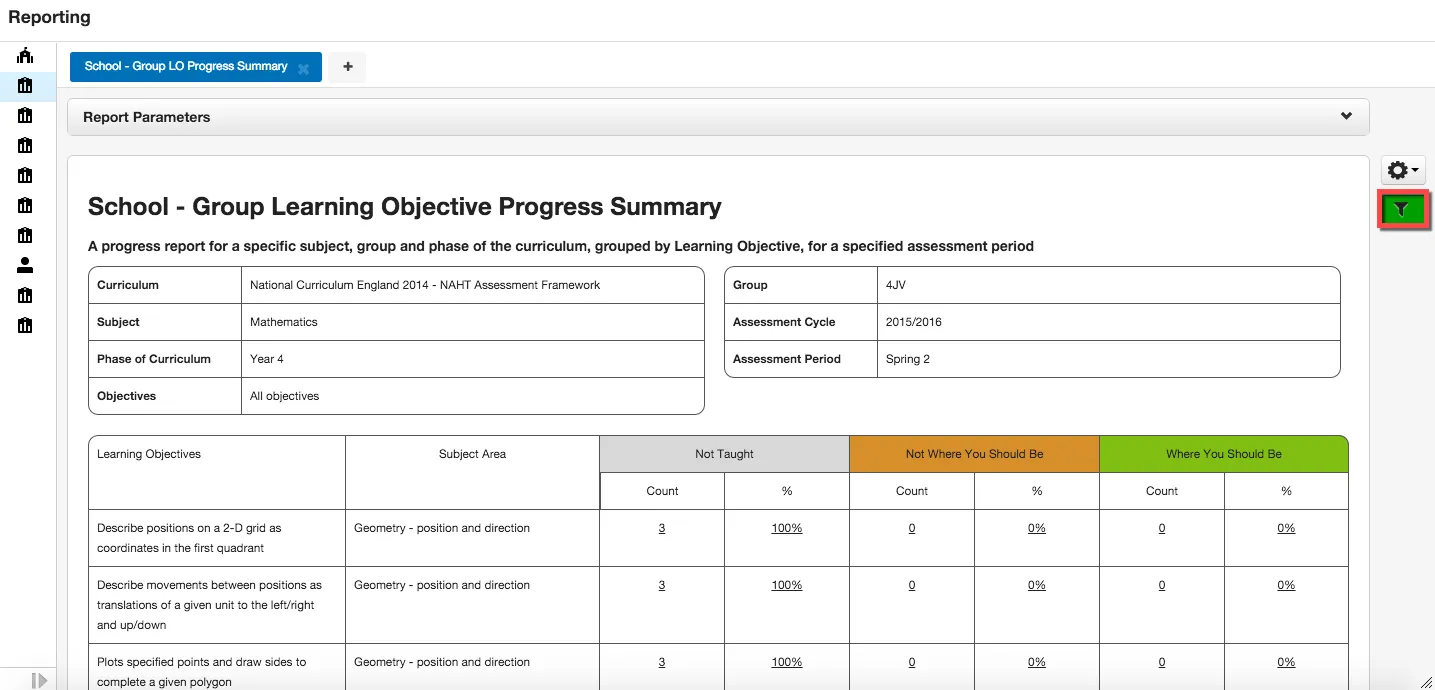
Reports that have a contextual data filter applied can be easily identified as the filter button is highlighted in green.
Reporting Application – Applying multiple contextual data filters
Multiple contextual data filters can be applied to a school report, however, you need to be aware of the logic in how the data will be presented back.
The logic applied when selecting multiple contextual data filters is AND logic. For example, you select the checkbox for the SEN and EAL filters and have these applied to the school report. Only students that were in both the SEN and EAL groups would be displayed in the tracker. Students that only existed in one of the groups, either SEN or EAL, would not be displayed in the tracker.
The Gender contextual data however uses OR logic. For example, you select the checkbox for Male and Female filters and have these applied to the tracker. Students that were in either the Male or Female would be displayed in the tracker.
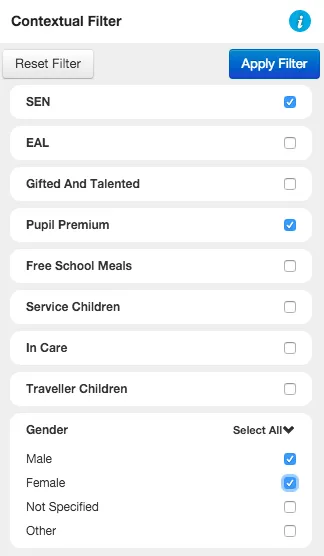
Below is a real example of how the context data filters could be used:
- Action – Select the contextual data filters for SEN, Pupil Premium, Gender (select Male and Female).
- Logic Breakdown – SEN (yes) AND Pupil Premium (yes)AND Boys (yes) OR Girls (yes).
- Expected Tracker Results – Students who are in both the SEN and Pupil Premium groups are displayed, who are both boys and girls.
Reporting Application – Removing a contextual data filter
To remove a contextual data filter that has been applied to a school report, select the green filter button.
When the Contextual Filter window is displayed, manually remove the checkboxes next to the contextual data filters or alternatively select the Reset Filter button.
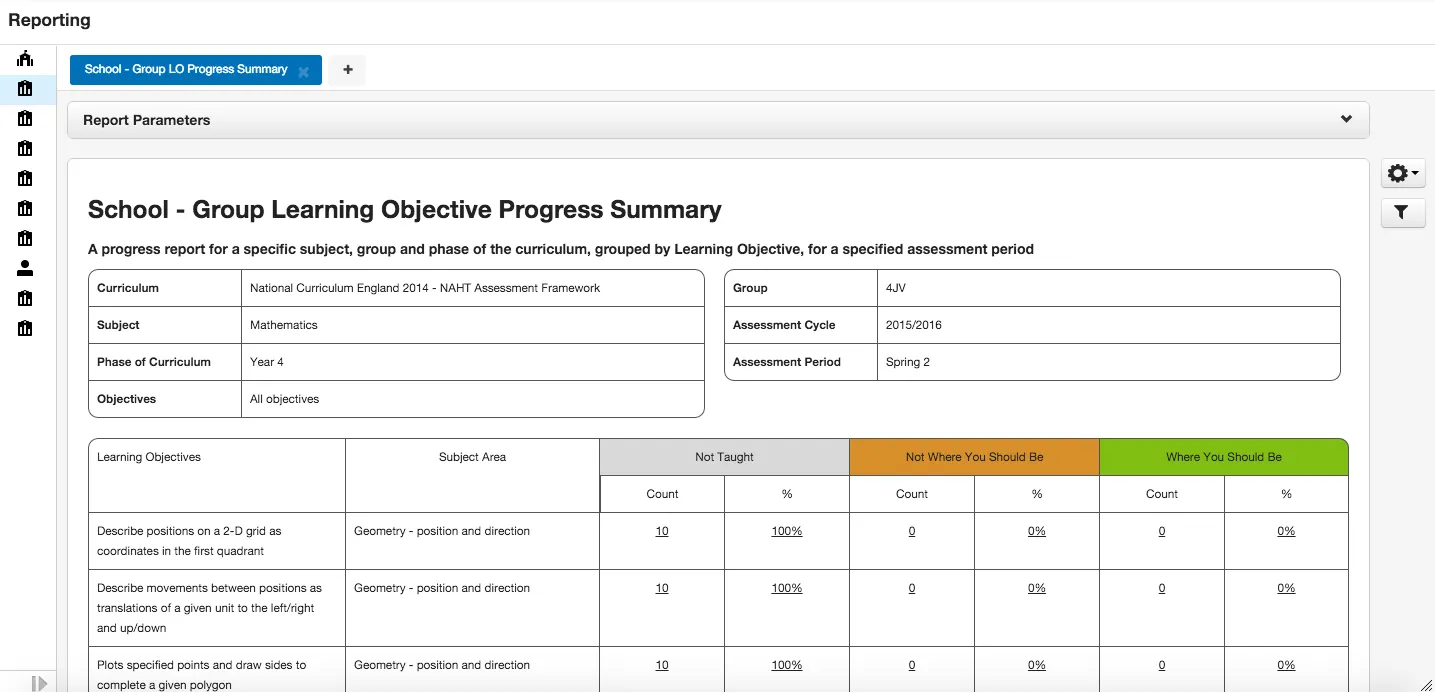
After selecting the Reset Filter button the school report will refresh and all data from the original criteria displayed.
Getting started series...


